자바스크립트 수업 내용 정리
onbeforeprint와 onafterprint

<!DOCTYPE html>
<html>
<head>
<title>onbeforeprint와 onafterprint</title>
<style>
#logoDiv {
display: none;
position: absolute;
left: 0;
top: 0;
width: 100%;
height: 100%;
}
</style>
<script>
window.onbeforeprint = function (e) {
logoDiv = document.getElementById("logoDiv");
logoDiv.style.display = "block"; // block으로 변경. 로고가 화면에 나타나게 함
}
window.onafterprint = hideLogo;
function hideLogo() {
logoDiv = document.getElementById("logoDiv");
logoDiv.style.display = "none"; // <div> 영역이 보이지 않게 함
logoDiv.style.zIndex = -1; // 이미지를 문서의 맨 바닥으로 배치
}
</script>
</head>
<body>
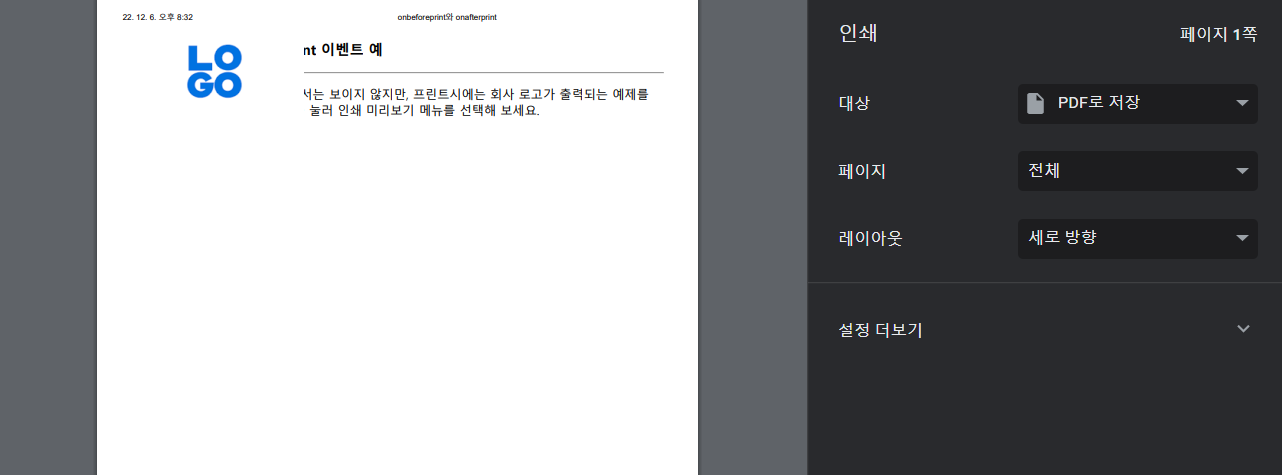
<h3>onbeforeprint, onafterprint 이벤트 예</h3>
<hr>
<div id="logoDiv">
<img src="media/logo.png" alt="이미지 없습니다.">
</div>
<p>안녕하세요. 브라우저 윈도우에서는 보이지 않지만, 프린트시에는 회사 로고가 출력되는 예제를
보입니다. 마우스 오른쪽 버튼을 눌러 인쇄 미리보기 메뉴를 선택해 보세요.</p>
</body>
</html>
웹 페이지 프린트
<!DOCTYPE html>
<html>
<head>
<title>웹 페이지 프린트</title>
</head>
<body>
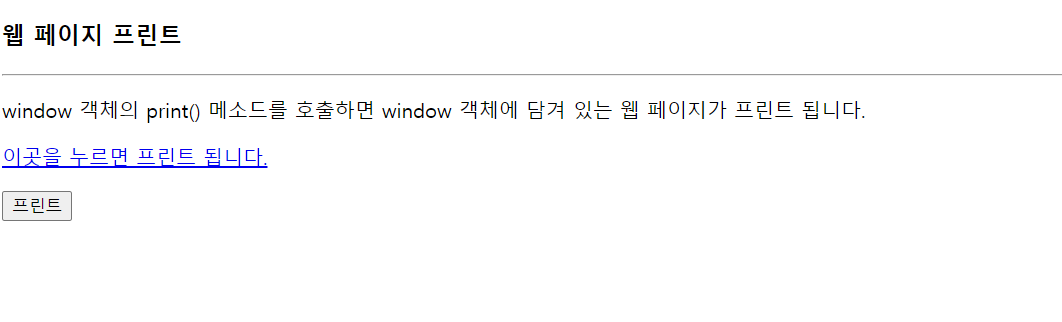
<h3>웹 페이지 프린트</h3>
<hr>
<p>window 객체의 print() 메소드를 호출하면
window 객체에 담겨 있는 웹 페이지가 프린트 됩니다.
<p>
<a href="javascript:window.print()">
이곳을 누르면 프린트 됩니다.</a>
<p>
<input type="button" value="프린트" onclick="window.print()">
</body>
</html>
setInterval()로 텍스트 회전
<!DOCTYPE html>
<html>
<head>
<title>setInterval()로 텍스트 회전</title>
</head>
<body>
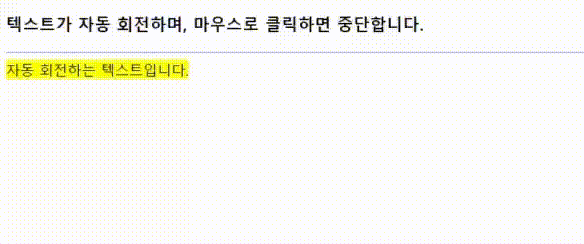
<h3>텍스트가 자동 회전하며, 마우스로 클릭하면 중단합니다.</h3>
<hr>
<div><span id="span" style="background-color:yellow">
자동 회전하는 텍스트입니다.</span>
</div>
<script>
var span = document.getElementById("span");
var timerID = setInterval("doRotate()", 200); // 200밀리초 주기로 doRotate() 호출
span.onclick = function (e) { // 마우스 클릭 이벤트 리스너
clearInterval(timerID); // 타이머 해제. 문자열 회전 중단
}
function doRotate() {
var str = span.innerHTML;
var firstChar = str.substr(0, 1);
var remains = str.substr(1, str.length - 1);
str = remains + firstChar;
span.innerHTML = str;
}
</script>
</body>
</html>
setTimeout()으로 웹 페이지 자동 연결
<!DOCTYPE html>
<html>
<head>
<title>setTimeout()으로 웹 페이지 자동 연결</title>
</head>
<body>
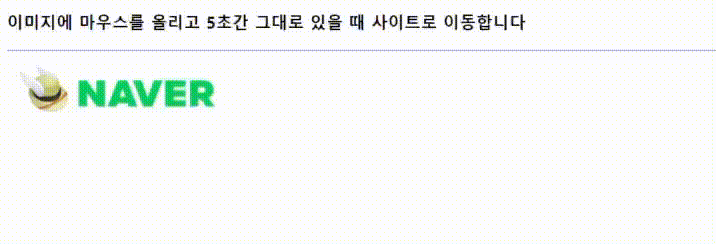
<h3>이미지에 마우스를 올리고 5초간 그대로 있을 때 사이트로 이동합니다</h3>
<hr>
<img id="img" src="media/naver.gif" onmouseover="startTimer(5000)" onmouseout="cancelTimer()">
<script>
var timerID = null;
function startTimer(time) {
// 타이머 시작
timerID = setTimeout("load('http://www.naver.com')", time);
// 이미지에 마우스 올리면 나타내는 툴팁 메시지
document.getElementById("img").title = "타이머 작동 시작...";
}
function cancelTimer() {
if (timerID != null)
clearTimeout(timerID); // 타이머 중단
}
function load(url) {
window.location = url; // 현재 윈도우에 url 사이트 로드
}
</script>
</body>
</html>
웹 페이지의 자동 스크롤
<!DOCTYPE html>
<html>
<head>
<title>웹 페이지의 자동 스크롤</title>
<script>
function startScroll(interval) {
setInterval("autoScroll()", interval);
}
function autoScroll() {
window.scrollBy(0, 10); // 10픽셀 위로 이동
}
</script>
</head>
<body onload="startScroll(1000)">
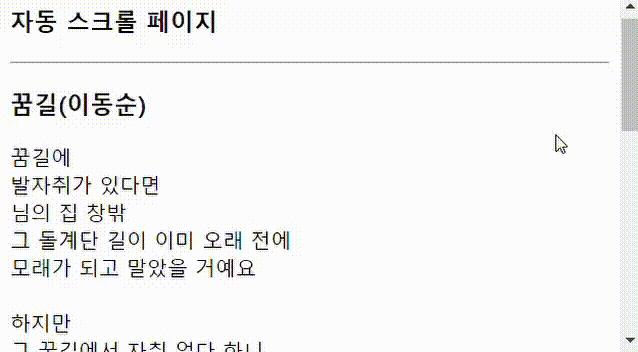
<h3>자동 스크롤 페이지</h3>
<hr>
<h3>꿈길(이동순)</h3>
꿈길에<br>
발자취가 있다면<br>
님의 집 창밖<br>
그 돌계단 길이 이미 오래 전에<br>
모래가 되고 말았을 거예요<br><br>
하지만<br>
그 꿈길에서 자취 없다 하니<br>
나는 그것이 정말 서러워요<br><br>
이 밤도<br>
나는 님의 집 창밖<br>
그 돌계단 위에 홀로 서서<br>
혹시라도 님의 목소리가 들려올까<br>
고개 숙이고 엿들어요<br>
꿈길에<br>
발자취가 있다면<br>
님의 집 창밖<br>
그 돌계단 길이 이미 오래 전에<br>
모래가 되고 말았을 거예요<br><br>
하지만<br>
그 꿈길에서 자취 없다 하니<br>
나는 그것이 정말 서러워요<br><br>
이 밤도<br>
나는 님의 집 창밖<br>
그 돌계단 위에 홀로 서서<br>
혹시라도 님의 목소리가 들려올까<br>
고개 숙이고 엿들어요<br>
</body>
</html>
window.location으로 웹 사이트 접속
<!DOCTYPE html>
<html>
<head>
<title>window.location으로 웹 사이트 접속</title>
<script>
function load() {
var select = document.getElementById("site");
window.location = select.options[select.selectedIndex].value;
}
</script>
</head>
<body>
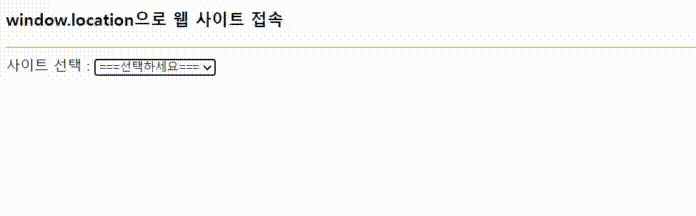
<h3>window.location으로 웹 사이트 접속</h3>
<hr>
사이트 선택 :
<select id="site">
<option value="http://www.naver.com" selected>네이버
<option value="http://www.google.com">구글
<option value="http://www.microsoft.com">마이크로소프트
</select>
<p>
<button onclick="load()">웹 사이트 접속</button>
</body>
</html>
option을 클릭하여 웹 페이지 접속하기
<!DOCTYPE html>
<html>

<head>
    <title>window.location으로 웹 사이트 접속</title>
    <script>
        function load() {
            var select = document.getElementById("site");
            window.location = select.options[select.selectedIndex].value;
        }
    </script>
</head>

<body>
    <h3>window.location으로 웹 사이트 접속</h3>
    <hr>
    사이트 선택 :
    <select id="site" onchange="if(this.value) window.open(this.value);">
        <option value="select" selected>===선택하세요===
        <option value="http://www.naver.com" >네이버
        <option value="http://www.google.com">구글
        <option value="http://www.microsoft.com">마이크로소프트
    </select>

</body>

</html>
윈도우 열기
<!DOCTYPE html>
<html>
<head>
<title>윈도우 열기</title>
<script>
function load(URL) {
window.open(URL, "myWin", "left=300,top=300,width=400,height=300");
}
</script>
</head>
<body>
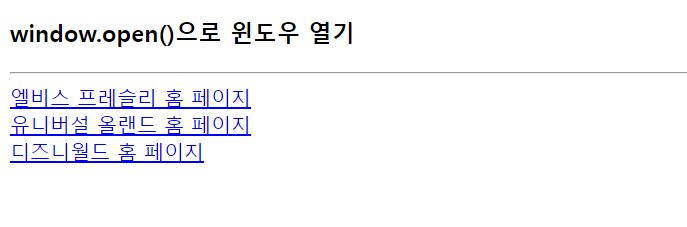
<h3>window.open()으로 윈도우 열기</h3>
<hr>
<a href="javascript:load('http://www.graceland.com')">
엘비스 프레슬리 홈 페이지</a><br>
<a href="javascript:load('http://www.universalorlando.com')">
유니버설 올랜드 홈 페이지</a><br>
<a href="javascript:load('http://www.disneyworld.com')">
디즈니월드 홈 페이지</a><br>
</body>
</html>
윈도우 닫기
<!DOCTYPE html>
<html>
<head>
<title>윈도우 닫기</title>
<script>
var newWin = null; // 새로 연 윈도우 기억
function load(URL) {
newWin = window.open(URL, "myWin", "left=300,top=300,width=400,height=300");
console.log(newWin);
}
function closeNewWindow() {
if (newWin == null || newWin.closed) // 윈도우가 열리지 않았거나 닫힌 경우
return; // 윈도우가 없는 경우 그냥 리턴
else
newWin.close(); // 열어 놓은 윈도우 닫기
}
</script>
</head>
<body>
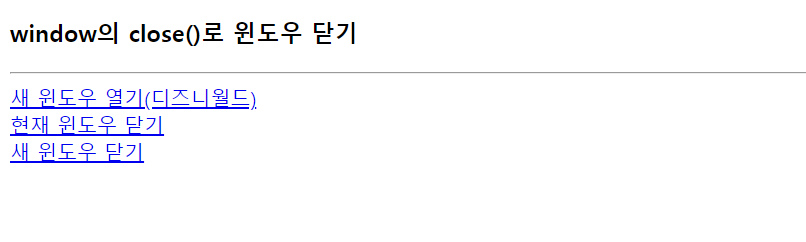
<h3>window의 close()로 윈도우 닫기</h3>
<hr>
<a href="javascript:load('http://www.disneyworld.com')">
새 윈도우 열기(디즈니월드)</a><br>
<a href="javascript:window.close()">
현재 윈도우 닫기</a><br>
<a href="javascript:closeNewWindow()">
새 윈도우 닫기</a>
</body>
</html>
윈도우의 위치와 크기 조절
<!DOCTYPE html>
<html>
<head>
<title>윈도우의 위치와 크기 조절</title>
</head>
<body>
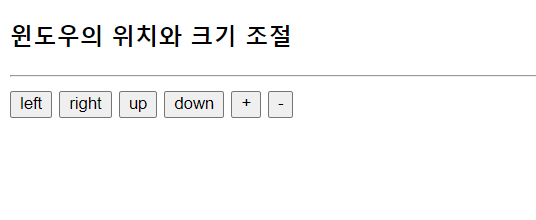
<h3>윈도우의 위치와 크기 조절</h3>
<hr>
<button onclick="window.moveBy(-10, 0)">left</button>
<button onclick="window.moveBy(10, 0)">right</button>
<button onclick="self.moveBy(0, -10)">up</button>
<button onclick="moveBy(0, 10)">down</button>
<button onclick="resizeBy(10, 10)">+</button>
<button onclick="resizeBy(-10, -10)">-</button>
</body>
</html>
API 연결하여 오늘의 날씨 구하기
<!DOCTYPE html>
<html lang="en">
<head>
<meta charset="UTF-8">
<meta http-equiv="X-UA-Compatible" content="IE=edge">
<meta name="viewport" content="width=device-width, initial-scale=1.0">
<title>Document</title>
</head>
<body>
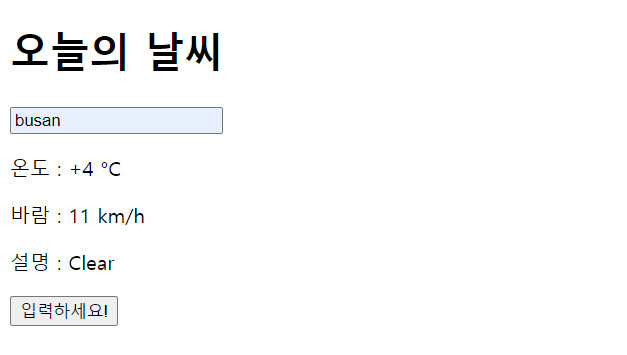
<h1>오늘의 날씨</h1>
<input type="text" id="city">
<p id="temperature"></p>
<p id="wind"></p>
<p id="description"></p>
<script>
function getweather() {
let city = document.getElementById("city").value;
fetch('http://goweather.herokuapp.com/weather/' + city)
.then((response) => response.json())
.then((data) => {
document.getElementById("temperature").innerHTML = "온도 : " + data['temperature']
document.getElementById("wind").innerHTML = "바람 : " + data['wind']
document.getElementById("description").innerHTML = "설명 : " + data['description']
});
}
</script>
<button onclick="getweather()">입력하세요!</button>
</body>
</html>

Leave a comment